Showing posts with label electric. Show all posts

Wednesday, November 13, 2013

CholoCycle Engine take down and battery mock-up

Roberto and I have been wanting to make an electric motorcycle for the longest time. This summer we actually started planning and budgeting everything out. over the last couple of months we had been craiglisting and going over different places in MA to spec out bike but couldn't find an appropiate one.About 2-3 weeks ago we were fortunate to receive techX project funding. We got $500 funding that we decided to put towards the frame acquisition. We intensified our craiglist search and last week we found some guy in dedham that had a bunch of bikes with blown engines he was willing to sell to us. We visited his sketchy ass shop (seriously, it looked like an abandoned warehouse from outside) and we found a kawasaki ZX-6R that we liked.
proud parents!
We brought the frame back to MIT and the next day starting gutting the bike.

We brought the frame back to MIT...
...and the next day starting gutting the bike.
taking out the carbs


taking off the radiators


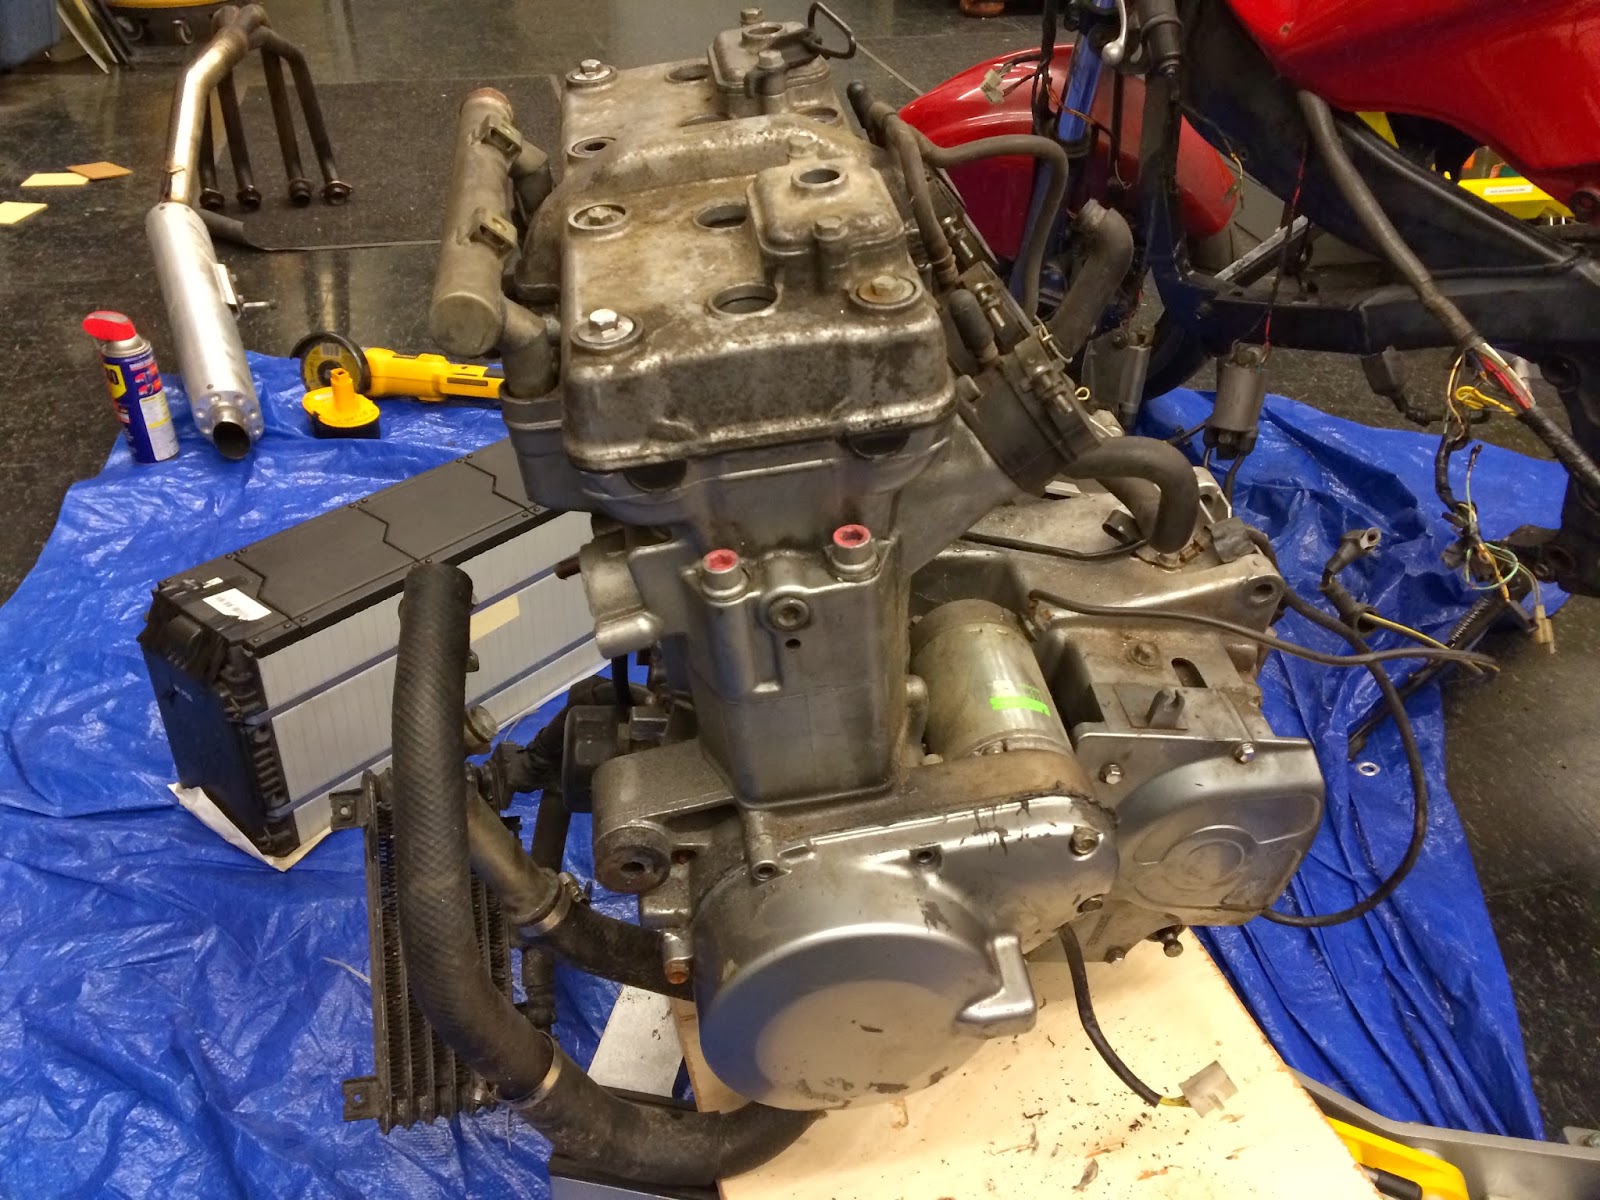
Time to take out the engine!

This turned out to be a much tougher job than we expected even considering we had 5 people (plus a camera-man) working on this.

Let's try to lift the whole bike upwards.
Hmmm, that didn't work...How the hell did they even get this engine inside there in the first place?!
Let's try to lift only the back....
Couldn't let this pic disappear in 8 seconds...
After several different attempts we finally managed to separate the engine from the chassis.


Finally the engine is out! 


Look at all that space!


SO HEAVY.
Taking off the engine was a cool and rather challenging task, we put a jack and a piece of wood under the bike and then unbolted the engine and then lifted the bike off the engine. This last part was especially tricky given the weird shape engines have. Nevertheless, after about 3 hours we were done! Thanks to Esther M., George H, Heidi B., Charlesg and Rachel D.C. for their help in the gutting!We took all the stock fairings off cause they were in pretty crappy condition and we are gonna buy a body kit for the bike. Here are some options we found: http://tinyurl.com/cholocycle. I put up a poll to ask our friends on fb what color the bike should be. We got pretty hilarious responses, check them out below:Roberto and I went to N52 today and laser-cutted a cardboard mock-up of one of the batteries we are considering. We tried several configurations. Our two main concerns are that we need to leave space for the motor (modeled as the red circle in the first picture) and we want the batteries as low as possible for a lower center of mass. 
Probably the best configuration


Maybe vertical?


This might actually work too. Clearance worries me a little though


We considered this for a second


Until we realized where all the weight of the bike would go if we drop choloCycle.

With the frame gutted, I started the mechanical design for the battery and motor holder. I was looking for some CAD for the ninja and stumbled upon this gem. A guy named Daniel Nguyen made a CAD of a ninja for his Intro to Cad class in UCLA. He intended to CAD the 2009 Ninja but he used the specs from a service manual for the 2002 model, which is the model we bought! I emailed daniel and he was gracious enough to let us have the CAD! Woohooo!We imported the CAD to solidworks and got rid of fairings and engines and exhaust etc and gave it some colors.

So pretty!

We mainly need the frame CAD so we can fit batteries and motors and whatever mounts we have.We are in the process of buying more stuff for the motorcycle (like motor and trying to get some batteries). We'll keep posting stuff during the build! Any questions let us know in the comments below.


Wednesday, September 26, 2012

TinyCycle!

So a couple of months ago I went back to Mexicali, Baja California, Mexico. Which is not in SoCal even though most people think that whenever I mention "Baja California" -_-. Anyway, I stayed there for a few days only so I could attend my sister's high school graduation (she's going to Princeton! wooo). During those days, I learned that one of my friends, Juan Bustamante, had a cousin who was throwing away a tiny motorcycle that wasn't working anymore. I went over to see if I could fix it or at least figure out what was wrong. The first things I checked were the battery and the motor. I don't really have any tools back home besides a screwdriver and a wrench so there wasn't much I could do but luckily my Juan had just bought a multimeter so we probed the battery and found that the 18v battery only had 4v across it. Which made sense considering the lead acid battery had not been charged in about four years. To check if the brushed DC motor still worked I had to place enough voltage across it make it overcome its own inertia  and have it start spinning. I didn't have a variable power supply so instead we got eight AA batteries and taped them in series to make a 12v "pack". The motor did spin so I decided to keep it for a future project (or maybe just to take it apart and use its stator). After we diagnosed the problem, Juan decided that he was never going to use it anymore so he offered to give it to me. I was unsure about whether or not I should bring the pocket bike with me back to MIT considering that it's more than 2500 miles away and it might be a problem to bring on the plane. So I did a quick Facebook post to see what my friends thought about it.
Clearly, they thought it would be awesome if I brought it and motorized it so I could race against Adrian who built his own electric pocket bike, MilliCycle

Mount without pocket
The first thing I had to do was figure out how to mount the motor onto the frame. The original motor was a brushed motor and it had its mount holes on the bottom so the frame had a mounting plate for it. I decided to take advantage of this so I took some scrap metal I found in N52-318 (room where the MIT Electric Vehicle Team meets). It was an aluminum C-Channel so my ex-roomie Roberto used the bandsaws and drill presses in D-Lab to help me cut off one of the sides and make mounting holes for both the frame and the motor. We later realized that we did not take into account the aluminum between the motor and the pulley so we had to go down to MITERS to mill a pocket for it.
Motor mount with pocket (it's on the other side)
motor controller attached with more scrap aluminum
I wanted TinyCycle to be way more powerful than RailScooter so I used a motor twice as big as the one on RailScooter. It's a Turnigy SK3 6374 Brushless Outrunner. It's 192kv and has a resistance of .016 ohms. More importantly, it has more power than I really need on such a small vehicle but meh, it should be fun. For the battery pack I soldered two custom 5s2p battery packs in series. This means I have a 33v pack on TinyCycle; much bigger than the 24v battery pack on RailScooter. The motor controller is also different. RailScooter uses a sensored kelly controller whereas TinyCycle uses a sensorless 250watt jasonTroller. The jasonTroller was clearly TinyCycle's limiting factor so I plan to swap it for a more a 500watt jasonTroller. Hopefully that will give me enough power to do wheelies!
bicycle mount in D-Lab

battery pack sketchily mounted with zip-ties.


TinyCycle's Maiden Voyage with the 250w controller


Garage Run with  a scooter, two go-karts, a quadrotor, and a tiny motorcycle
So many little EV's!
Garage Run from the Shane's quadrotor's point of view
Cute British Accent Asian Girl
So apparently, tinyCycle is a chick-magnet. A couple of TDC brothers and I were riding it around dorm row last Saturday night around 1am. Which is also the time MIT frat parties are over. Several girls walked over toward us and started asking me about tinyCycle. 
I even got the above girl's phone number :) 

Monday, May 7, 2012

RailScooter

This semester I decided to be a hipster 2.007 and opted out of the mainstream 2.007 robot competition. Instead, I enrolled in the Electric Vehicle (EV) section of 2.007. In this section, led by Charles GuanShane Colton, and Eli Davis, each student had to come up with an idea for an electric vehicle. Any electric vehicle, from a go-kart to an electric kid-tricycle. We would then get to design, machine, race, and keep our vehicles! Deciding what vehicle to make was a tough decision between practicality and novelty. But in the end, I decided I would make a scooter because it was something that I could actually use to commute across campus.
$40 A3 scooter from Amazon
The first item I bought was an actual scooter. To make my life easier, I decided to use the scooter's pole and folding mechanism. This meant I had to design and machine a new frame and fork for mine.

Noobishly printed the parts from solidworks
I then bought a large 1/4'' aluminum plate from McMaster-Carr (amazon prime for Meche's) which I used to machine the new fork for my scooter. My initial plan was to print out the shapes from SolidWorks and then trace them on the plate to accurately cut it with a bandsaw. Unfortunately, I somewhere in between the transition from SolidWorks to printer to paper, the ratio between the solidworks sheet and the physical sheet stopped being 1:1. So I ended up with a fork that was larger than I had originally accounted for. Fortunately, I realized this before drilling the holes and assembling the fork.
my decapitated scooter :(
With the drive train done and the fork assembled, I was around a third of the way done with my scooter. But I still had to figure out a way to attach the handle to the frame of the scooter, attach the latch and poly-carbonate cover, and finally, wire the whole thing together.
Playing the sensor game
 After finally finishing the mechanical frame, I got to the tedious and annoying find-the-correct-combination-of-wires game. There are 12 combinations: 6 from the three motor wires times 2 from the ABC sensor wires.
the latch works :D

Awesome pcb sensor mounts designed by Charles G.
Charles made our life way easier by designing and ordering some circuit boards that would hold the sensors and make it easier to slide them on the motor in order to find the right position for them. This is important because the position of the sensors will affect the amount the current the motor pulls from the controller.
Finally found the correct combination
 I got lucky and found the wire combination pretty quickly but I got stuck a really long while finding the right position for the sensors.

My scooter works!
WUUUUUUWWWWW!!!!! It works!!! Sadly, in an event that reminds me of Charles' reverse polarity battery connection before the 2.007 competition. As I was riding my scooter from N52 towards TDC I decided to go full throttle on Mass Ave and over the railroad tracks.... Needless to say, I flipped over and went flying around 15mph and fell on my left arm. A car, a bicycle, and several bystanders stopped to ask me if I was ok as I stood up, picked up my scooter and the broken fork from the ground and sadly carried my scooter back home :(

This occurred less than twelve hours before the EV Race :(

In memory of the obvious event, I christened my scooter, "RailScooter". :D

Yay! No broken bones.
Things I learned this semester:
  • Use a mill whenever you can! I had so many problems making a fork for my scooter because I would try to use my calipers to make aligning holes on two pieces and failed every time. The main problem was that I had band-sawed all the pieces for my fork so they were not exactly.. straight. This meant that measuring the proper positions for the holes was very difficult. Finally, I should have used more center point drill bits to make sure that I drilled the holes in the (already inaccurate measured) positions I had chosen.
  • Very important! Use at least THREE screws (on each side) in the plate that holds the shock absorber. Most of the torque caused by your weight and by going over bumps (and conveniently, railroad tracks) acts on this plate. The problem with screws is that their threads weaken the material and make it very susceptible to shearing. This is why in my new (very hastily built) fork, I made sure that the plate was sitting on the 1/4'' aluminum fork side AND then screwed together. This way the aluminum would have to break before the screws are sheared off. My new fork will probably be waterjetted since I've already made the design in solidworks. It will use t-bolt slots and be substantially prettier and sturdier than my current fork.
  • In retrospect, I should've done more research on the other scooters that other students had built because, honestly, I did not know what I was doing 80% of the time. Most of my time went into fixing slight misalignments and other errors I made. 


My injured wrist,  RailScooter, and me.